Author: opsclimb

  • How I Calculate Sludge Wasting Rates (Step-by-Step for Operators)

    When I first started, sludge wasting felt like guesswork.

    Turn a valve, watch the numbers, hope nothing crashes.

    But once I understood how to actually calculate it, everything changed. I stopped reacting—and started controlling the process.

    This is exactly how I calculate sludge wasting rate on shift, step by step.

    ⚠️ Why Wasting Rate Matters More Than You Think

    Your wasting rate controls:

    • Sludge age (SRT)
    • MLSS concentration
    • Process stability
    • Effluent quality

    Too little wasting:
    → Old sludge, filament growth, bulking

    Too much wasting:
    → Young sludge, loss of bugs, poor treatment

    👉 This is one of the most important adjustments you make as an operator

    🔢 The Simple Way I Think About It

    At its core, wasting is just:

    How many pounds of solids am I removing per day?

    Once you understand that, the math becomes straightforward.

    📐 Step 1: Use the Pounds Formula

    This is the formula I use every time:

    \text{Pounds} = Q \times C \times 8.34

    Where:

    • Q = flow (MGD)
    • C = concentration (mg/L)
    • 8.34 = conversion factor

    🧪 Step 2: Plug in WAS Flow and Concentration

    Let’s say on my shift I have:

    • WAS flow = 0.05 MGD
    • WAS concentration = 8,000 mg/L

    Now I calculate:

    • Pounds wasted per day =
      0.05 × 8000 × 8.34

    = 3,336 lbs/day removed

    👉 That’s your actual wasting rate

    🎯 Step 3: Compare to Your Target (This is what most miss)

    The calculation alone doesn’t mean anything unless you compare it to:

    • Current MLSS
    • Desired MLSS
    • Sludge age (SRT)

    If MLSS is climbing → I increase wasting
    If MLSS is dropping → I decrease wasting

    👉 I’m always adjusting toward a target, not guessing

    ⚙️ Step 4: Adjust in Small Moves

    I never make big swings.

    Instead:

    • Increase/decrease wasting 10–20% at a time
    • Watch the system over 1–2 days
    • Adjust again if needed

    👉 Wastewater is slow—overcorrecting causes problems

    🔄 Step 5: Connect This to Sludge Age (SRT)

    If you want more control, tie wasting to sludge age.

    Basic idea:

    • Higher wasting → lower sludge age
    • Lower wasting → higher sludge age

    This is exactly how I fix issues like:

    📊 What I Actually Watch Daily

    I don’t just calculate and walk away—I track:

    • MLSS
    • Effluent clarity
    • Sludge blanket level
    • SVI (if available)

    These tell me if my wasting rate is working.

    🚫 Mistakes I See All the Time

    I’ve made these myself:

    • ❌ Not knowing WAS concentration
    • ❌ Changing wasting without checking MLSS
    • ❌ Making huge adjustments too fast
    • ❌ Ignoring trends over multiple days

    👉 Wasting is about trends, not single data points

    ⚡ My On-Shift Shortcut (When I Don’t Have Time)

    If I’m busy, here’s my quick method:

    • MLSS rising? → increase wasting slightly
    • MLSS dropping? → decrease wasting
    • Settling getting worse? → check sludge age

    👉 It’s not perfect—but it keeps things under control

    💡 What Took Me Too Long to Learn

    Wasting isn’t just a number—it’s your main control lever.

    Once I started tracking pounds wasted per day, I stopped:

    • chasing problems
    • overcorrecting
    • guessing

    And the plant became way more stable.

    📥 If You Want My Exact Calculator

    I put together a simple wasting rate calculator + cheat sheet that shows:

    • Pounds removed per day
    • MLSS targets
    • Adjustment guidelines

    👉 (This is where you plug your product)

    🔚 Final Thought

    If you can control wasting, you can control your plant.

    Everything else—DO, settling, effluent—starts to fall into place once this is dialed in.

    Read more…
  • How I Increase MLSS in the Aeration Tank (Without Crashing the Plant)

    How I Increase MLSS in the Aeration Tank (Without Crashing the Plant)

    I’ve seen a lot of operators panic when MLSS starts dropping.

    Effluent gets cloudy. Bugs look thin. Someone says, “We need more solids in the system.”

    And then someone makes a huge adjustment… and things get worse.

    I’ve done that too.

    Now I handle it differently—and it works without crashing the plant.

    Here’s exactly how I increase MLSS step by step.

    🔍 First—What MLSS Actually Tells Me

    MLSS (Mixed Liquor Suspended Solids) is basically:

    👉 How much biology I have in the system

    • Low MLSS → not enough bugs → poor treatment
    • High MLSS → too many solids → settling issues

    So when MLSS drops, I don’t panic—I diagnose.

    ⚠️ Step 1: Confirm It’s Actually Low (Don’t Guess)

    Before I adjust anything, I check:

    • Recent MLSS trend (not just one test)
    • Effluent clarity
    • Sludge blanket level

    If MLSS is trending down over a few days, then I act.

    🔧 Step 2: Reduce Wasting (This is the main move)

    If I want MLSS to go up, I keep more solids in the system.

    So I:

    👉 Reduce wasting rate

    • Close the WAS valve slightly
    • Cut wasting time back
    • Monitor daily

    🔁 Why This Works

    • Less sludge removed → more solids stay in system
    • More solids → MLSS increases
    • MLSS increases → sludge age increases

    ⚙️ Step 3: Make Small Adjustments Only

    This is where most operators mess up.

    I don’t shut wasting off completely.

    Instead:

    • I reduce wasting 10–20% at a time
    • Watch the trend over 1–2 days
    • Adjust again if needed

    👉 Slow changes = stable plant

    🌬️ Step 4: Support It with Proper DO

    As MLSS increases, oxygen demand goes up.

    If you ignore this, you’ll create a new problem.

    So I check:

    • DO levels (keep around 1.5–3.0 mg/L typically)
    • Air distribution

    👉 More bugs = more oxygen needed

    🌀 Step 5: Watch Settling Closely

    Higher MLSS isn’t always better.

    As I increase MLSS, I watch:

    • Settling in clarifier
    • Sludge blanket depth
    • Effluent clarity

    If settling starts getting worse:
    👉 I know I’m going too far

    ⚡ Step 6: Know When to Stop

    I don’t chase a number—I watch performance.

    I stop increasing MLSS when:

    • Effluent is clear
    • Settling is stable
    • MLSS is in a reasonable range

    👉 There’s no “perfect” MLSS—only what works for your plant

    📊 Real Example (How I Handle It)

    Let’s say:

    • MLSS dropped from 3,000 → 2,000
    • Effluent starting to get cloudy
    • Ammonia creeping up

    Here’s what I do:

    1. Reduce wasting slightly
    2. Monitor MLSS daily
    3. Increase aeration if needed
    4. Watch settling

    Within a few days:
    👉 MLSS climbs back up and stabilizes

    🚫 Mistakes I Avoid Now

    These will cause bigger problems fast:

    • ❌ Shutting off wasting completely
    • ❌ Ignoring DO while increasing MLSS
    • ❌ Chasing a specific MLSS number
    • ❌ Increasing MLSS when settling is already poor

    🔗 How This Connects to Everything

    Once you understand MLSS control:

    • Low MLSS → reduce wasting
    • High MLSS → increase wasting
    • Bulking → often too high sludge age
    • Instability → usually poor control of solids

    👉 It all ties back to wasting + sludge age

    💡 What Took Me Too Long to Learn

    MLSS isn’t something you “fix” once.

    It’s something you manage daily.

    Small adjustments, watching trends, and staying patient—that’s what keeps the plant stable.

    🔚 Final Thought

    If you can control MLSS, you can control your entire biological process.

    Everything else becomes easier:

    • Settling
    • Effluent quality
    • Stability

    Read more…

    How to calculate sludge wasting rate

    How I fix bulking sludge

  • What Is a Good Sludge Age in Wastewater (and How I Actually Adjust It)

    When I first heard “sludge age” (or SRT), it sounded like one of those textbook terms that didn’t really matter on shift.

    I was wrong.

    Once I understood sludge age, everything clicked:

    • Why my sludge wouldn’t settle
    • Why ammonia wouldn’t drop
    • Why the plant felt unstable

    Now it’s one of the main things I use to control the entire process.

    Here’s how I think about it—and how I actually adjust it in the real world.

    🔍 What Sludge Age Really Means (Simple Explanation)

    Sludge age = how long your microorganisms stay in the system

    That’s it.

    • Low sludge age → young, fast-growing bugs
    • High sludge age → older, slower bugs

    👉 You’re basically managing the life cycle of your biology

    📊 So… What Is a “Good” Sludge Age?

    It depends on your plant, but here’s how I think about it on shift:

    🟢 Typical Ranges I Use:

    • 3–5 days → Young sludge (fast, less stable)
    • 5–10 days → Balanced (what I aim for most of the time)
    • 10+ days → Old sludge (risk of bulking/filaments)

    🎯 My Rule of Thumb:

    • If I need nitrification → I run a higher sludge age
    • If I need better settling → I avoid going too old
    • If I see bulking → sludge age is usually too high

    👉 There’s no perfect number—only what your plant needs

    ⚠️ Signs Your Sludge Age Is Too High

    I’ve seen this a lot:

    • Sludge won’t settle
    • High SVI
    • Filamentous growth
    • Thick, dark mixed liquor
    • Rising sludge blanket

    👉 This is exactly where things like bulking sludge start

    ⚠️ Signs Your Sludge Age Is Too Low

    This one is just as bad:

    • Loss of nitrification (ammonia rises)
    • Thin, weak floc
    • Cloudy effluent
    • Low MLSS

    👉 You’ve basically washed out your bugs

    🔧 How I Actually Adjust Sludge Age (Simple and Practical)

    Here’s the part most articles mess up—they overcomplicate it.

    I don’t.

    I adjust sludge age using one main lever:

    👉 WASTING

    ⚙️ The Relationship That Controls Everything

    • Increase wasting → sludge age goes down
    • Decrease wasting → sludge age goes up

    That’s it.

    If you understand that, you can control your system.

    📐 (Optional) The Formula Behind It

    If you want the math, sludge age (SRT) is:

    SRT = \frac{\text{Mass of solids in system}}{\text{Mass of solids wasted per day}}

    But on shift?
    I don’t sit there calculating this all day.

    👉 I use trends + wasting adjustments

    🔄 My Step-by-Step Adjustment Process

    This is what I actually do:

    Step 1: Look at the plant

    • Settling good or bad?
    • Effluent clear or cloudy?
    • Any foam or filaments?

    Step 2: Check MLSS trend

    • Rising? → sludge age increasing
    • Falling? → sludge age decreasing

    Step 3: Adjust wasting

    • Sludge too old? → increase wasting slightly
    • Sludge too young? → decrease wasting

    Step 4: Wait and watch (this is critical)

    I give it:

    • 24–48 hours before making another move

    👉 Wastewater doesn’t respond instantly

    ⚡ Real Example (How I Handle It)

    Let’s say:

    • MLSS is climbing
    • Settling is getting worse
    • SVI is high

    I know:
    👉 Sludge age is too high

    So I:

    • Increase wasting slightly
    • Monitor MLSS daily
    • Watch settling improve over time

    🚫 Mistakes I Avoid Now

    These will mess you up fast:

    • ❌ Making big wasting changes all at once
    • ❌ Ignoring MLSS trends
    • ❌ Trying to “fix everything at once”
    • ❌ Not giving the plant time to respond

    🔗 How This Connects to Everything Else

    Once you understand sludge age, you start seeing the whole system differently:

    • Bulking sludge? → sludge age too high
    • Ammonia not dropping? → sludge age too low
    • MLSS unstable? → wasting problem

    👉 This is why this concept is so powerful

    💡 What Took Me Too Long to Learn

    I used to chase:

    • DO
    • chemicals
    • random adjustments

    Now I focus on:
    👉 sludge age + wasting

    And most problems solve themselves.

    🔚 Final Thought

    Sludge age isn’t just a number—it’s how you control your biology.

    Once you understand it, you stop reacting and start running the plant with confidence.

  • MLSS Explained Simply

    MLSS stands for Mixed Liquor Suspended Solids.

    In simple terms, it measures the concentration of solids in the aeration basin.

    Why MLSS Matters

    MLSS represents the biological population treating wastewater.

    Too little biomass:

    • weak treatment

    Too much biomass:

    • oxygen demand issues
    • settling problems

    Operators Use MLSS To

    • monitor treatment strength
    • adjust wasting
    • stabilize the process
    • support nitrification

    Important Reminder

    MLSS alone does not tell the full story.

    Operators also evaluate:

    • sludge age
    • settling
    • oxygen levels
    • clarifier performance

    Final Thoughts

    MLSS is one of the core measurements operators use to understand biological treatment health.

  • How I Fix Bulking Sludge Fast (Step-by-Step Guide for Operators)

    I’ve dealt with bulking sludge more times than I can count—and if you’re reading this, you’re probably in the middle of it right now.

    Cloudy effluent. Sludge won’t settle. Blanket rising. Maybe even getting that call from a supervisor.

    Here’s the truth:
    You don’t need a textbook explanation—you need a fix.

    This is exactly how I handle bulking sludge on shift, step by step.

    ⚠️ First—Confirm It’s Actually Bulking

    Before I touch anything, I make sure I’m not chasing the wrong problem.

    Here’s what I look for:

    • Sludge rising slowly in the clarifier
    • Fluffy, light solids (not compact)
    • High SVI (usually >150)
    • Poor settling in settleometer (30-min test)

    If that’s what I’m seeing, I move fast.

    🔍 Step 1: Check Dissolved Oxygen (DO) Immediately

    Low DO is one of the most common causes.

    I grab a meter and check:

    • Aeration basin DO should usually be around 1.5–3.0 mg/L

    If it’s low:

    • I increase air right away
    • Check blowers
    • Open valves if needed

    👉 In my experience, this alone fixes a lot of bulking issues within hours

    🧪 Step 2: Look for Filamentous Growth

    Bulking is often caused by filamentous bacteria outcompeting floc-formers.

    Signs I look for:

    • Stringy sludge
    • Foam on aeration basin
    • Poor compaction

    If I suspect filaments:

    • I prepare for chemical or operational adjustments (next steps)

    ⚙️ Step 3: Increase Wasting (Carefully)

    If sludge age is too high, filaments thrive.

    What I do:

    • Increase wasting slightly (don’t go extreme)
    • Monitor MLSS daily

    Goal:

    • Bring sludge age down gradually

    👉 Dumping too much sludge too fast can crash your process—don’t do it

    🧯 Step 4: Use Chlorination (If Needed)

    This is a targeted move—not always necessary, but very effective.

    If bulking is severe:

    • I apply RAS chlorination (return activated sludge line)

    Why this works:

    • It knocks back filamentous bacteria without killing everything

    ⚠️ Important:

    • Start low and monitor closely
    • Over-chlorinating will cause bigger problems

    🌀 Step 5: Improve Mixing & Air Distribution

    Dead zones = filament growth.

    I check:

    • Are diffusers clogged?
    • Are certain zones under-aerated?
    • Is mixing even across the basin?

    Fixing airflow distribution can stabilize things fast.

    ⏱️ Step 6: Monitor Daily (This is where most fail)

    Once I make adjustments, I track:

    • MLSS
    • SVI
    • DO
    • Effluent clarity

    I don’t just “set it and forget it”

    👉 Bulking is something you steer out of—not flip a switch

    🚫 Common Mistakes I Avoid

    I’ve made these before—don’t repeat them:

    • ❌ Wasting too aggressively
    • ❌ Ignoring DO levels
    • ❌ Blindly adding chemicals
    • ❌ Not checking sludge under a microscope
    • ❌ Waiting too long to act

    ⚡ My “Fast Fix” Checklist (What I Actually Do First)

    If I had to act quickly, here’s my order:

    1. Check DO → increase air
    2. Look at settling (confirm bulking)
    3. Slightly increase wasting
    4. Inspect for filamentous growth
    5. Consider RAS chlorination (if needed)

    💡 What I’ve Learned Over Time

    Bulking sludge isn’t random—it’s your plant telling you something is off:

    • Too little oxygen
    • Sludge too old
    • Poor mixing
    • Filament takeover

    Once you understand that, you stop reacting and start controlling the process.

    🔚 Final Thought

    When I first started, bulking sludge stressed me out more than anything.

    Now?
    It’s just another process adjustment.

    If you stay calm, check the fundamentals, and make controlled moves—you’ll fix it.

  • Package Plant Wastewater Operation Guide

    What Makes Package Plants Different

    Package plants are compact systems designed for smaller communities, developments, or facilities.

    They often combine:

    • aeration
    • clarification
    • disinfection

    Into one smaller footprint.

    The Biggest Challenge

    Package plants respond faster than larger systems.

    That means:

    • problems appear faster
    • adjustments affect the system faster
    • operator attention matters more

    What I Monitor Closely

    1. Aeration

    Small systems can lose DO quickly.

    I watch:

    • blower operation
    • diffuser condition
    • mixing

    2. Clarifier Performance

    Because clarifiers are smaller, sludge issues show up quickly.

    I monitor:

    • sludge blanket
    • rising sludge
    • effluent clarity

    3. Flow Changes

    Package plants often experience sudden flow swings.

    Examples:

    • schools
    • campgrounds
    • seasonal facilities

    That variability affects biology fast.

    Common Problems

    Bulking Sludge

    Often caused by:

    • low DO
    • poor wasting
    • shock loading

    Equipment Failures

    Small plants depend heavily on equipment reliability.

    One blower failure can quickly become serious.

    Final Thought

    Package plants work well when operators stay proactive.

    Small systems leave less room for neglect.

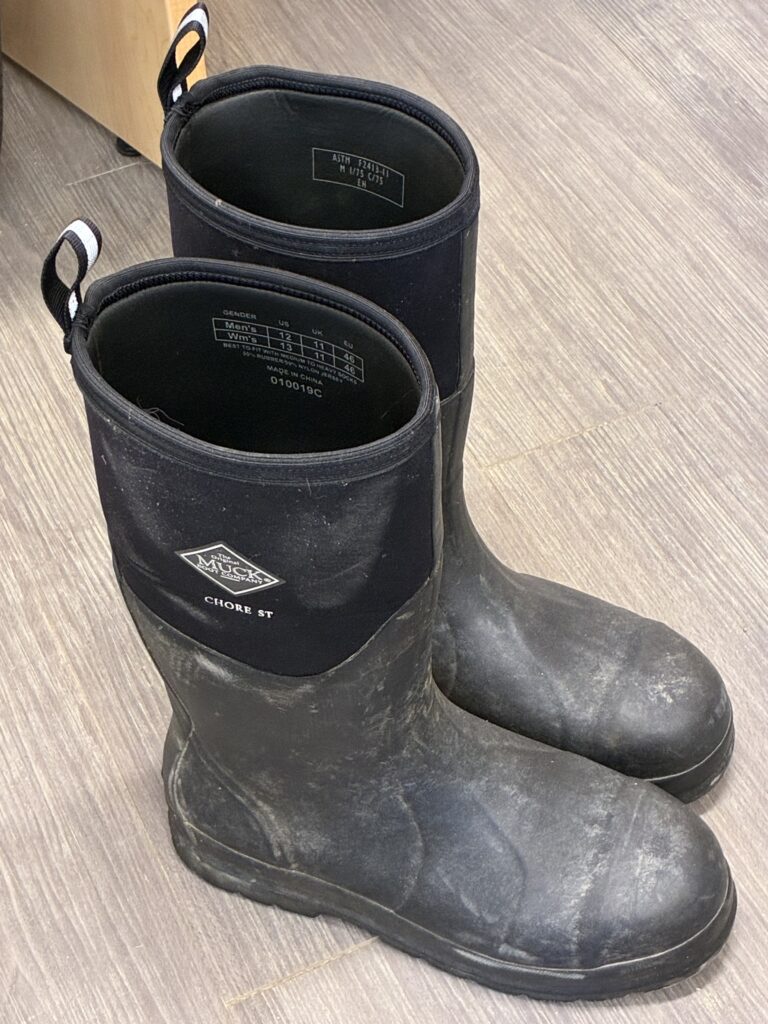
  • Best Boots for Wastewater Operators

    Wastewater operators spend long hours:

    • walking concrete
    • climbing stairs
    • working in wet conditions
    • standing for extended periods

    Bad boots can ruin a shift.

    What Matters Most

    Comfort

    You may walk several miles daily.

    Slip Resistance

    Wet surfaces are everywhere.

    Waterproofing

    Wastewater plants are not dry environments.

    Durability

    Cheap boots wear out fast.

    Common Mistake

    Many operators buy the heaviest boot possible thinking it equals quality.

    Comfort matters more over long shifts.

    Extra Tip

    Invest in quality insoles.

    That small upgrade makes a huge difference.

    Final Thoughts

    Good boots are not just comfort equipment.

    They affect:

    • fatigue
    • safety
    • long-term joint health

    They’re worth investing in.

  • How to Adjust Sludge Blanket in a Clarifier

    Why Sludge Blanket Matters

    The sludge blanket tells me a lot about what’s happening in the clarifier.

    Too low:

    • wasting solids unnecessarily
    • poor solids inventory

    Too high:

    • risk of solids washout
    • rising sludge
    • cloudy effluent

    The goal is stability—not chasing random numbers.

    Step 1: Measure the Blanket Correctly

    I use:

    • sludge judge
    • core sampler
    • blanket sensor (if available)

    I always measure:

    • same time daily
    • same location if possible

    Trending matters more than one reading.

    Step 2: Look at Clarifier Performance

    I don’t adjust based only on blanket depth.

    I also check:

    • effluent clarity
    • sludge settling
    • solids carryover
    • flow conditions

    A blanket can be slightly high and still perform fine.

    Step 3: Adjust RAS and Wasting Carefully

    If blanket rises too high:

    • increase RAS slightly
    • increase wasting if needed

    If blanket drops too low:

    • reduce wasting carefully

    Small adjustments work best.

    Step 4: Watch for Rising Sludge

    If sludge floats upward:

    • check nitrification/denitrification
    • monitor sludge age
    • inspect DO levels upstream

    Gas formation often causes rising sludge.

    Final Thought

    Clarifiers reward operators who watch trends instead of overreacting.

    Small consistent adjustments keep the system stable.

  • Aerobic vs Anaerobic Digestion: Pros and Cons in Wastewater Treatment

    One thing that confused me early on was the difference between aerobic and anaerobic digestion.

    Both stabilize sludge.

    Both reduce waste.

    But they work very differently.

    Here’s the simple operator-level explanation.

    What Is Aerobic Digestion?

    Aerobic digestion uses:
    👉 oxygen-loving microorganisms

    The process requires:

    • aeration
    • oxygen supply
    • mixing

    The organisms break down sludge under aerobic conditions.

    Pros of Aerobic Digestion

    Easier to Operate

    Aerobic systems are usually:

    • simpler
    • more forgiving
    • easier for smaller plants

    Lower Odor Problems

    Because oxygen is present:

    • septic conditions are reduced
    • odors are usually less severe

    Good for Small Facilities

    Many smaller plants use aerobic digestion because:

    • startup is easier
    • operation is simpler

    Cons of Aerobic Digestion

    High Energy Use

    Blowers and aeration equipment use a lot of electricity.

    That increases operating costs.

    Less Energy Recovery

    Aerobic digestion does not produce useful methane gas like anaerobic systems.

    What Is Anaerobic Digestion?

    Anaerobic digestion uses:
    👉 microorganisms that operate without oxygen.

    The process breaks down sludge in sealed digesters.

    Pros of Anaerobic Digestion

    Produces Methane Gas

    One huge advantage:
    👉 biogas production

    Plants can use methane for:

    • heating
    • electricity
    • energy recovery

    Lower Long-Term Energy Costs

    Once operating efficiently, anaerobic systems may reduce energy expenses.

    Handles Large Sludge Volumes Well

    Large facilities often benefit most from anaerobic digestion.

    Cons of Anaerobic Digestion

    More Complex

    Anaerobic digesters require:

    • tighter control
    • temperature monitoring
    • gas management

    More Sensitive to Upsets

    Toxic loads or sudden changes can upset anaerobic biology more easily.

    Odor Risks

    Without proper operation:

    • odor issues can become severe

    Which One Is Better?

    It depends on the plant.

    Smaller Plants Often Prefer:

    👉 aerobic digestion

    Larger Facilities Often Prefer:

    👉 anaerobic digestion

    Because energy recovery becomes more valuable at larger scale.

    Final Thought

    Aerobic digestion is usually simpler.

    Anaerobic digestion is usually more efficient for larger sludge handling and energy production.

    Both have advantages depending on plant size and operational goals.

  • Chlorine vs UV Disinfection in Wastewater Treatment

    Disinfection is one of the final steps before wastewater discharge.

    Two of the most common methods are:

    • chlorine disinfection
    • UV disinfection

    Both work well—but very differently.

    How Chlorine Disinfection Works

    Chlorine kills microorganisms chemically.

    Common forms include:

    • sodium hypochlorite
    • chlorine gas
    • calcium hypochlorite

    The chlorine reacts with pathogens and destroys them.

    Pros of Chlorine Disinfection

    Strong Disinfection

    Chlorine is highly effective against many pathogens.

    Residual Protection

    One major advantage:
    👉 chlorine residual remains in the water temporarily.

    This provides ongoing disinfection after treatment.

    Widely Used

    Many operators are already familiar with chlorine systems.

    Cons of Chlorine Disinfection

    Safety Risks

    Especially with chlorine gas:

    • leaks can be dangerous
    • strict safety procedures are required

    Dechlorination Often Needed

    Excess chlorine can harm receiving waters.

    Many plants must remove chlorine residual before discharge.

    Chemical Handling

    Chemical storage and feed systems require maintenance.

    How UV Disinfection Works

    UV systems use ultraviolet light to damage microorganisms’ DNA.

    This prevents reproduction and infection.

    Pros of UV Disinfection

    No Chemical Storage

    No chlorine chemicals required.

    Safer for Operators

    Fewer hazardous chemical concerns.

    No Dechlorination Needed

    UV leaves no residual disinfectant behind.

    Cons of UV Disinfection

    Water Must Be Clear

    High turbidity reduces UV effectiveness.

    Suspended solids can block UV light.

    Lamp Maintenance

    UV lamps require:

    • cleaning
    • replacement
    • monitoring

    No Residual Protection

    Once water leaves the UV system:
    👉 no ongoing disinfection remains.

    Which One Is Better?

    It depends on:

    • permit requirements
    • plant design
    • operator preference
    • effluent quality

    Plants with cleaner effluent often perform very well with UV systems.

    Final Thought

    Chlorine disinfection is powerful and proven.

    UV disinfection offers safer operation with fewer chemicals.

    Both can work extremely well when properly operated and maintained.